In today’s digital era, visuals dominate the web landscape. Images and videos can make a difference between good and great articles. Your WordPress website is no exception to this need. If you have a visually rich website, do not underestimate the need for image optimization in WordPress.
The Practical Guide to Image Optimization in WordPress is a comprehensive resource providing valuable insights and strategies for optimizing images on WordPress websites. With a focus on enhancing page load times and improving user experiences, this guide offers step-by-step instructions and best practices to maximize your website’s performance and visual appeal. Whether you are a beginner or an experienced WordPress user, this guide will equip you with the knowledge and tools necessary for image optimization in WordPress.
If these images are not optimized properly, it can significantly hamper website performance, SEO, and rankings.
Understanding Image Optimization
What is Image Optimization
Image optimization is a process that allows you to decrease the file size of your images as much as possible without sacrificing quality.
This process of image optimization involves the following:
- Reducing the size of the image
- Optimizing alt attributes of the image,
- Choosing the correct file format for images, and
- Ensuring images are responsive.
Why Image Optimization is Crucial for WordPress Sites
The importance of Image optimization stems from its direct impact on website performance and UX.
- It enhances the speed of your WordPress site, ensuring that pages load quickly. In a world where speed is of the essence, a slow-loading website is a surefire way to deter visitors. You will likely lose visitors if your website takes longer than 3 seconds to load.
- Image optimization plays a vital role in SEO. Search engines, like Google, prioritize websites that load faster and provide a better user experience. Optimized images reduce page load times, potentially improving your SEO and ranking in search results.
- Optimizing your WordPress images also helps you save storage space on your server. It will help you use the available space on your server better and stay within the hosting server limits.
Large, unoptimized images can have a negative effect:
- It takes longer to load, meaning higher page load times. This has an even more significant impact on users with slow internet connections.
- This lag in loading times frustrates users and can affect your site’s engagement metrics, such as time on site and conversion rates.
The bottom line is you cannot afford to ignore image optimization.
To get the best out of images on your website, read on and learn how to optimize images effectively on the WordPress platform.
The Basics of Images
To do an effective job of optimizing, it is essential to understand some of the basics of images. Let us start by taking a look at the types of image files. You may be familiar with some of them, but the newer types are more efficient.
Types of Image Files
- JPEG: Ideal for photographs and images with smooth variations in tone and color. JPEGs use lossy compression, meaning some quality is lost when the image is compressed.
- PNG: Best suited for images with text, line drawings, or when you need transparency. PNGs use lossless compression, so image quality is not lost with compression. The file size might be larger, though.
- GIF (Graphics Interchange Format): Primarily used for simple animations and low-resolution film clips. GIFs use 256 colors and lossless compression, making them unsuitable for high-quality images.
- WebP: A modern format that provides superior lossless and lossy compression for images on the web. WebP images can be 26% smaller than PNGs and up to 24% smaller than JPEGs. All this without losing quality, making them a good choice for web usage.
Understanding Image Dimensions and Resolution:
- The Dimension of an image refers to its width and height in pixels.
- The Resolution of an image refers to the density of pixels in an image, usually measured in pixels per inch (PPI).
For web use, a lower resolution of 72 PPI is enough. Higher resolutions increase file size without providing any noticeable benefit on standard displays.
The role of Image Compression and its effects:
Image compression reduces file size by:
- Either removing image data (lossy compression) or
- By identifying and eliminating redundant data (lossless compression).
Lossy compression reduces size but can degrade the image quality if overused.
Lossless compression maintains image quality but often results in a much lesser reduction in file size.
The key is to find a balance between the smallest file size and acceptable image quality.
Now that we have covered the basics of images let us look at how we can optimize images in WordPress for better performance.
How do you test for image optimization in WordPress?
Using speed testing tools like Google PageSpeed Insights, WebPageTest.org, and GTmetrix, you can identify image optimization opportunities. Each tool provides unique insights and recommendations for optimizing images on your website.
Enter your website URL in the speed testing tool, and run the analysis. The test report will provide recommendations for you to implement. These recommendations could include:
- Opportunities for compressing images,
- Images that can be resized to reduce file size
- Use of modern lightweight formats like WebP and
- Implementing lazy loading
All the tools mentioned above provide details to varying degrees, so I suggest you test with all of them and ensure you have an excellent comprehensive view of actions to improve image performance on your website.
Also, make it a point to re-test once you have completed the optimization tasks and check the performance improvement. Once you have a good baseline, you should make it a point to test regularly.
Practical Tips for Image Optimization in WordPress
Regarding image optimization, most guides will discuss plugins or CDNs as the fastest way to optimize. And they are right for the most part – the low-hanging fruit and easy-to-do stuff can quickly be done using plugins or a CDN, and we will cover that later in the article.
But first, let us run through a list of practical tips that can help you set up an image optimization baseline that you can continue to build on as your website grows with time.
1. Resizing Images
While specific needs may vary, here are general guidelines for standard image sizes on most websites:
- Featured Images (Blog Posts/Articles): 1200 x 630 pixels. This size is versatile for sharing on social media and looks good when displayed as a featured image.
- Background Images: 1920 x 1080 pixels. This size works well for full-screen backgrounds and maintains quality on most desktop displays.
- Post Images (Within Content): 750 x 500 pixels. It is ideal for images within articles or blog posts, balancing visibility with quick loading.
- Logo Images: 200 x 100 pixels (depending on the logo’s shape). Logos must be clear and legible at a small size for headers.
- OpenGraph Images (Social Media Sharing): 1200 x 630 pixels. Facebook recommends this size and generally works across most social platforms for link previews.
- Thumbnail Images: 150 x 150 pixels. Suitable for product listings, gallery thumbnails, or small profile pictures.
- Hero Images/Sliders: 1600 x 500 pixels. This size is large enough for a wide display and can be adjusted based on the slider’s aspect ratio and responsiveness needs.
- Gallery Images: 800 x 600 pixels. Offers a good balance between detail and load time for displaying portfolio pieces or product images.
2. Choose the Right Image Format
In WordPress, selecting the correct image format is pivotal in website optimization. Here’s a guide on when to use JPEG (JPG), PNG, GIF, or WebP formats:
Use JPEG for blog post images, real estate galleries, or any scenario where image quality and color variation are priorities, and slight compression artifacts are acceptable.
Use PNG for logos, icons, infographics, and images requiring a transparent background. It’s also suitable for images with limited colors or when preserving every detail is crucial.
Use GIFs for small, simple animations such as loading icons, simple illustrations, or when the image contains few colors. Avoid using GIFs for large or detailed images due to their limited color palette and large file sizes.
WebP is ideal for all images, including photographs, graphics, and animations, especially when optimizing for speed and performance on a WordPress site. Given its compatibility and performance advantages, use WebP wherever possible, considering browser support.
Considerations for WordPress
Compatibility: Ensure the browsers most used by your audience support WebP (WebP Browser compatibility). While modern browsers widely support it, fallback options (like JPEG or PNG) might be necessary for older browsers.
Conversion Tools: You can use WordPress plugins like Smush, Imagify, Shortpixel, or Optimole to convert existing images to the optimal format without manual re-uploading.
3. Compress Images
Compressing images involves reducing the file size of images without significantly compromising their quality. Compressed images need less bandwidth, which means faster pages and all the benefits of quick-loading pages.
You can compress images manually by using a desktop or an online tool to compress the images before you load them on your website. You can use GIMP (free), Photoshop (paid), or TinyPNG (free).
The easier and simpler alternative is to use an automatic image compression plugin that compresses images as you upload them to your website. Plugins like Smush, Shortpixel, Imagify, and Optimole all do an excellent job compressing images.
For best results, you should approach the compression of images as part of a process where you resize images as needed and choose the correct image format.
4. Lazy Load Images
Lazy loading is an optimization technique that delays loading images on a webpage until they are needed, specifically as they are about to enter the viewport.
This means images not immediately visible to the user upon page load (e.g., those further down the page) won’t be loaded upfront. This approach significantly improves page load times, reduces initial page weight, and conserves bandwidth, enhancing user experience and SEO.
WordPress introduced native support for lazy loading images in version 5.5. This built-in feature automatically adds the loading=”lazy” attribute to img tags with defined width and height attributes, making it a seamless part of the WordPress experience without additional plugins or custom code.
Several plugins are available for websites running on older versions of WordPress or those seeking more control over lazy loading (e.g., for iframes or videos). Plugins like WP Rocket, Smush, and FlyingPress offer extended functionality and customization options.
Do not lazy load above-the-fold images. More on this in the next section.
5. Preload Above-the-fold Images
Optimizing above-the-fold images in WordPress is crucial for improving your website’s loading time and enhancing the user experience when a visitor lands on your page. “Above the fold” refers to the portion of the webpage that is visible without scrolling. Since this area makes the first impression on your visitors, optimizing its images is paramount.
Identify which images are truly critical to display immediately. Make sure you exclude these above-the-fold images from Lazy loading. Lazy loading should be limited to only below-the-fold images for best performance.
Above-the-fold images typically include your site’s logo, main navigation icons, and any hero or banner images. Focus on optimizing these images first to ensure they load quickly.
Preloading refers to instructing the browser to load specific resources, such as images, stylesheets, or scripts, early in the page load process.
You can manually add a link tag to the <head> section of your HTML to preload specific images. For example:
<link rel="preload" href="path-to-your-image.jpg" as="image">
Alternatively, you can use plugins like FlyingPress or Perfmatters, which allow you to preload critical images.
6. Responsive Images
Ensuring responsive images in WordPress is vital to delivering a fast, efficient, and visually appealing website across all devices. WordPress already incorporates several features to support responsive images out-of-the-box, but there are additional practices and tools that you can use to improve responsive design.
WordPress automatically adds srcset (which allows the browser to choose the right image size) and sizes attributes (which inform the browser about the image size based on different viewport widths) to images inserted into content via the WordPress editor, ensuring basic responsive behavior.
Select a theme that is designed with responsive design and images in mind. A well-coded theme will not only support WordPress’s native responsive image features but also include additional optimizations for different screen sizes.
Even though WordPress handles responsive images, uploading appropriately sized and compressed images for the web is crucial. We have covered this above, so make sure you resize images for the best performance.
Monitor your site regularly for mobile usability:
Google Search Console’s Mobile Usability report can help identify pages on your site that have issues with responsive images or other elements, allowing you to make necessary adjustments.
Test your website pages using Google Lightspeed, look for image-related issues that might crop up, and address them proactively.
7. Add Missing Image Dimensions
When image dimensions (width and height) are specified, the browser can allocate space for images before they are fully loaded, preventing layout shifts that can disrupt the user experience and negatively impact Core Web Vitals scores.
You can manually specify the image dimensions using width and height attributes in the image tag in HTML. But this is cumbersome and not scalable.
If you use the WordPress editor to add images, dimensions are automatically added based on your selected size. This should address most images.
Most WordPress Speed or Image optimization plugins offer a feature that scans your site for images without dimensions and automatically adds them. This should address any that you might have otherwise missed.
8. Remove EXIF Data of Images
EXIF data is metadata included in image files containing information such as the camera settings used to take the photo, the date and time it was taken, and potentially the location where it was taken.
While useful for photographers and image management, EXIF data is not necessary for images published on a website and can be safely removed to gain the following benefits:
- By stripping this metadata, you reduce the file size of your images, making them quicker to load. Faster loading times improve user experience and positively impact your site’s SEO ranking.
- EXIF data can contain sensitive information, such as the precise GPS location where a photo was taken. Removing this data helps protect the privacy and reduces the risk of inadvertently sharing confidential information.
- Smaller image file sizes consume less storage space on your hosting server, which can be particularly beneficial for websites with many images.
- Serving images without EXIF data uses less bandwidth, speeding up site loading times for visitors and reducing hosting costs, especially for high-traffic sites.
Plugins like ShortPixel and Smush can help you remove EXIF Data as part of their image optimization features.
9. Don’t Use Image URL Redirects
Avoiding direct image URL redirects plays a crucial role in image optimization.
When a browser requests an image that has been moved or redirected to a different URL, it must follow a series of HTTP requests until it reaches the final location of the image. This process can significantly delay the loading of images and, by extension, the entire webpage.
So, don’t embed images from external sites. Upload any images you use to your website and serve it directly from your server.
10. Disable Hotlinking of Images
Hotlinking occurs when other websites link directly to images on your server, causing your server to deliver those images to other sites. This can consume your server’s bandwidth and resources, leading to various issues.
By disabling the hotlinking of images in WordPress, you can protect your website’s resources and improve its overall performance.
So how do you protect your website from image hotlinking? Here are a few things you can do:
- Many content delivery networks (CDNs) offer built-in options to block hotlinking and are easily configurable through their dashboards.

- You can use a plugin like All In One WP Security & Firewall and configure the Prevent Hotlinks feature. Some plugins can disable the right-click feature on your web pages, preventing third parties from getting the image path to hotlink.
- You can also add a code snippet to your htaccess file, but I recommend one of the above options.
11. Add Alt Text to your Images
Alt text, which is short for alternative text, impacts user experience and search engine optimization (SEO).
Alt text improves web accessibility by providing a textual description of images for users who are visually impaired and rely on screen readers to navigate the web. This ensures all users can understand the content, even if they cannot see the images.
Search engines, like Google, use alt text to understand the context and content of images. Well-crafted alt text can improve your website’s visibility in search results, particularly in image search, by providing search engines with relevant keywords associated with your images.

You can use a plugin like Auto Image Attributes from Filename to automatically add Alt Text and Image titles to your field name. It uses the File name as the reference. All you need to do is give the images relevant and readable file names so they can double up as Alt text.
12. Use a Local Avatar Plugin
If you are a blog or a website where you get a lot of comments, you will need to request gravatar.com to get user images to be shown next to their comments.

Try using a local avatar plugin like One User Avatar, which allows you to disable the gravatar image and set a default avatar for visitors from your media library. No more external requests. We use it on this blog, and we have found it quite simple and easy to use.
The Best WordPress Plugins for Image Optimization
Several recommendations highlighted above can be quickly delivered by an Image Optimization plugin – compression, generating WebP format, missing dimensions, removing EXIF Data, lazy loading of images, etc. Using a WordPress plugin can be a quick way to implement some of the basics of image optimization on your website, and for most small to medium websites, this is the best option.
Smush
Key Features:
- Performs lazy loading, bulk smushing (image compression), and incorrect size image detection.
- Integrates seamlessly with WordPress Media Library for easy access and management. Images are optimized on Smush servers via an API and save your server resources.
- It provides lossless compression, ensuring images are reduced in size without affecting visual quality.
- It offers a free version with unlimited compressions, but there is a size limit of 5 MB per image.
- It has a unique feature of scanning and highlighting images that are not correctly sized for their display containers, helping users make adjustments for optimal performance.
- The Smush Pro plugin is available starting at $3 per month for the basic plan. With the Pro version, you can convert images to WebP, deliver images from a CDN, and access better compression options.
Optimole
Key Features:
- Optimole uses cloud-based processing to optimize images, ensuring zero load on your server.
- Dynamically serves images in the correct size (responsive) and optimizes them based on the visitor’s device and screen size.
- Includes built-in lazy loading and supports WebP and retina screens.
- Leverages a global CDN to serve optimized images, enhancing global load times.
- Real-time image optimization based on the visitor’s actual viewing context, such as device and viewport, for precise optimization.
- A significant plus is that the free version is fully functional, but the caveat is that this applies only to 1000 visitors monthly. You must subscribe to a paid Optimole plan to handle more visitors. Plans start from $27 per month for 40000 visitors a month.
ShortPixel
Key Features:
- Provides lossy, glossy, and lossless compression options to cater to various needs.
- Capable of optimizing PDF documents in addition to images.
- Offers automatic and bulk image optimization options and removes EXIF data.
- Supports WebP format and retina images and includes options for backing up original images.
- Offers a generous amount of free monthly optimizations and the ability to purchase one-time or monthly additional credits, appealing to both small and large websites.
- The Free plan allows the optimization of 100 free credits per month. If you need more, you can purchase a Shortpixel paid plan – additional credits starting from $20 for 30000 image credits, which is more than enough for most small to medium websites. If you need more, you can always try their unlimited plan at $ 9.99 monthly.
- Shortpixel also offers an alternative plugin called Shortpixel Adaptive Images, which delivers optimization on the fly via a CDN. Depending on your need, you can select either of the plugins. You can also use any credits purchased with both plugins and across multiple websites.
Imagify
Key Features:
- Imagify offers three levels of compression: Normal, Aggressive, and Ultra, giving users control over the balance between image quality and file size.
- Automatically resizes images on upload based on predefined dimensions.
- Supports WebP conversion
- Integrates directly with WordPress Media Library for easy management.
- Provides direct integration with the popular WordPress caching plugin, WP Rocket, for combined image and performance optimization.
- The free plan gives you 20 MB monthly or the ability to optimize around 200 images a month. If you need anything more, you will need an Imagify paid plan that starts at $ 5.99 per month and can handle 5000 images per month across unlimited websites.
Serve Images using a CDN
CDNs offer all the benefits of globalized content delivery along with specialized features like on-the-fly image compression and automatic delivery of images in modern formats like WebP. These capabilities provide significant advantages over traditional WordPress image optimization plugins by enhancing performance, compatibility, and efficiency.
On-the-Fly Compression: Many CDNs can dynamically compress images when requested, ensuring that only the optimized version is delivered to the user. This real-time compression eliminates the need for pre-processing images before upload, saving time and storage space on the origin server.
Adaptive Compression Levels: Some CDNs can adjust the level of compression based on the image content, the user’s device, and network conditions, ensuring a balance between load times and image quality. This adaptability is often more sophisticated than the static compression settings available in WordPress plugins.
Automatic WebP Conversion: CDNs can automatically convert images to the WebP format based on the capabilities of the user’s browser. This ensures that users with browsers that support WebP receive images in this format, further speeding up load times.
Global Reach: CDNs distribute your images across a global network of servers, significantly reducing latency by serving images from the location nearest to each user. This global distribution network is something WordPress plugins cannot replicate on their own.
Ease of Maintenance: By offloading image optimization, format conversion, and delivery to a CDN, website owners can reduce the complexity of their WordPress setup. This minimizes the need for multiple plugins and reduces the potential for plugin conflicts, streamlining website maintenance.
In summary, leveraging a CDN for image optimization offers comprehensive benefits beyond what traditional WordPress image optimization plugins can provide. By combining advanced image compression, automatic format conversion, and global content delivery, CDNs enhance website performance, user experience, and security, making them a powerful tool for modern web optimization.
When it comes to CDNs, here are my recommendations:
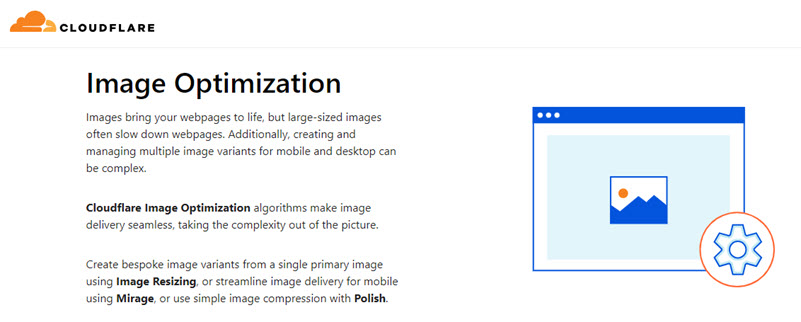
- Cloudflare Pro: Cloudflare Pro plan at $ 20 per month, which includes image resizing, mobile optimization, image compression, and delivery via CDN
- Cloudflare Enterprise with hosting: Better still, if you are using Cloudways or Rocket.net hosting, you can take advantage of the Cloudflare Enterprise plans, which include Image optimization. I use Cloudways with the Cloudflare Enterprise add-on ($ 5 per month) for this blog.
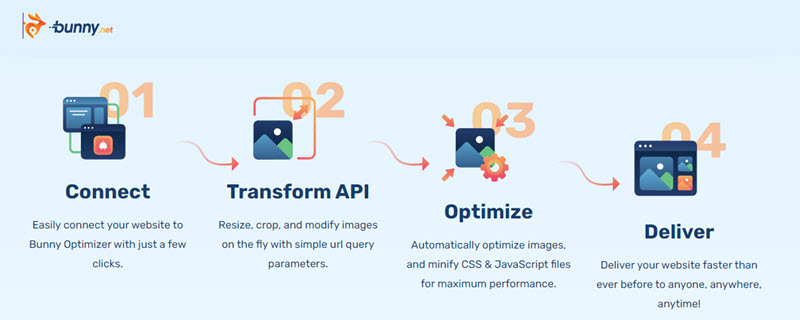
- Bunny CDN: Bunny CDN with Bunny Image Optimizer is another excellent option – Bunny has excellent POP coverage and is frequently at the top of CDN performance charts.

- FlyingCDN: FlyingCDN is a budget alternative. It costs $3 monthly for a single site/ 100 GB. It runs on the Bunny CDN platform, so you know you will get good performance. FlyingCDN Combined with FlyingPress, a caching and optimization plugin, you can implement most of the recommended speed optimizations for your website.
Conclusion
Image optimization is a critical component of web performance and user experience enhancement. What you should do will depend on your budget, traffic, and requirements.
If you are just starting online or have a small website with limited images, follow some of the best practices highlighted above and install one of the free plugins that meet your needs.
If your website is growing or you have loads of images (like a photography website, online catalog, or an eCommerce store), go for one of the image optimization plugins with a paid plan (and an image CDN especially if you have high traffic).
For a high-traffic website with lots of images, your best bet is CDN service with image optimization services like Cloudflare or Bunny.net.
Remember, the strategic use of modern image formats like WebP, coupled with advanced technologies offered by plugins or CDNs, such as resizing, lazy loading, on-the-fly compression, and global content delivery, will ensure that images are served quickly and efficiently to users worldwide.

