If you have installed WP Rocket on your WordPress site, this guide will help you maximize the performance you can get from the plugin. The WP Rocket plugin is easy to install and use. Caching and other default options are enabled on activation, resulting in an immediate performance boost.
To get the most out of WP Rocket, you should configure the additional settings in the plugin. To do this, a good understanding of the different settings is valuable. By the end of this guide, you should know each of the settings and our recommendations and use them to configure the best WP Rocket settings for your WordPress installation.
In addition to configuring WP Rocket, the guide will show you how to connect your website to Cloudflare on a free CDN plan and discuss other speed optimization plugins you can use with WP Rocket.
Default WP Rocket Setup
The assumption here is that you have already purchased WP Rocket. If not, you can read our in-depth review of WP Rocket or buy the plugin on the WP Rocket website. After purchase, download the plugin from their website and use the Upload Plugin option in your WordPress admin dashboard to install and activate the WP Rocket plugin.
On activation, the following features are enabled by default:
- Page Caching
- GZIP Compression and Browser Caching
- Google fonts optimization is deployed
- WordPress Emoji is disabled
- Mobile Caching
- Cache lifespan is set to 10 hrs
- Cache Preloading and Link Preload are activated
- Reduced Heartbeat Activity
The default settings applied by WP Rocket will deliver an out-of-the-box performance boost to your website. We will quantify this with performance metrics on a test website. Please note that this is only an indicator of the performance gain you can potentially get. Every website is different – the hosting server you are using, how optimized your theme is, the network connection and latency, the size of your website, and page size – so performance gains can also vary.
No article on speed optimization is complete without some live performance data. To put things in perspective, we will also carry out performance tests to show how WP Rocket, with Image Optimization and a CDN, reduced the page loading speed of our test website from 5.03 seconds to 0.67 seconds and page size from 963 Kb to 166 Kb.
Test Website
The specifications of the test website used for performance tests in this article are as follows:
Hosting
WordPress website running on Cloudways hosting/ Digital Ocean Servers (1 GB Premium) in a data center in Bangalore, India
Theme
Astra Pro theme from Brainstorm Force (one of the most popular WordPress themes)
Test Page
A sample post with 600 words and 6 post images was created and used as the test page.
Performance Tool
WebPageTest.org was used as the Performance Testing tool
Connectivity: 5 Mbps Cable Internet with 28ms Latency
Test User Location: Virginia, USA
The table below shows that WP Rocket significantly improves performance with just the default settings.
| Performance Metric | Without WP Rocket Plugin Average time in Sec | With WP Rocket Default Settings Average time in Sec | % change |
|---|---|---|---|
| Time to First Byte (TTFB) | 2.21 | 1.03 | -54% |
| First Contentful Paint (FCP) | 2.92 | 1.71 | -41% |
| Largest Contentful Paint (LCP) | 2.99 | 1.71 | -43% |
| Total Page Loading Time | 5.03 | 3.76 | -25% |
| Page Size in Kb | 963 | 959 | 0% |
In the next section, we will review the recommended WP Rocket settings.
Recommended WP Rocket Settings
1. Dashboard
The Dashboard section displays your WP Rocket license information and Rocket CDN subscription (if you have one).
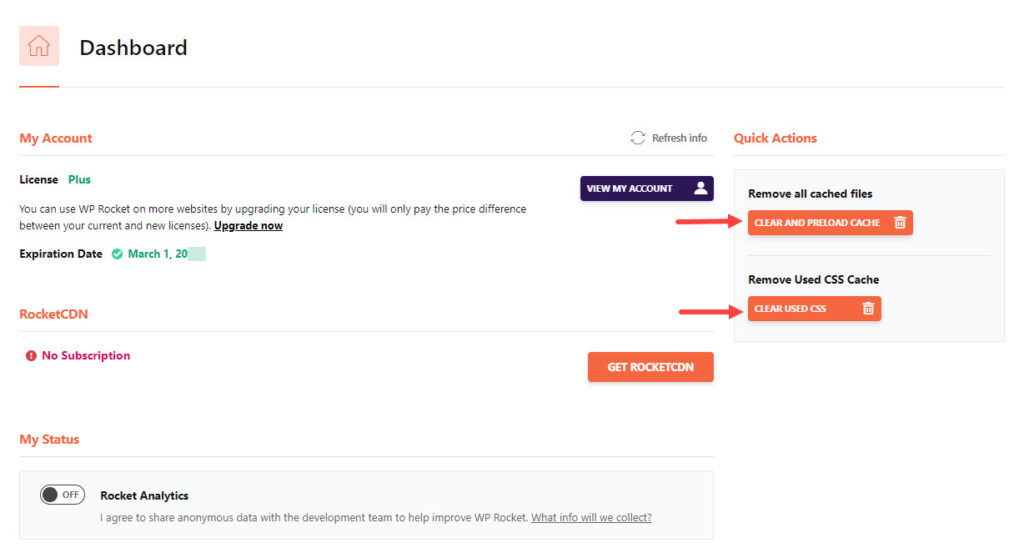
You can also clear your website’s cache and Used CSS from the dashboard.
Leave the “Rocket Analytics” toggle in the OFF state unless you want to share data for improvement.
2. Cache Settings
The Cache feature is turned on by default. We will run through a few advanced settings below.
If you are using WP Rocket only for its optimization features and not caching, you can disable it with the help of a helper plugin.
| Cache Setting | Status or Value |
|---|---|
| Enable Caching for Mobile Devices | Enable |
| Separate Cache Files for mobile devices | Disable |
| User Cache | Disable |
| Cache Lifespan | The default is 10 Hrs. Increase to 24 Hrs if your website does not change frequently |
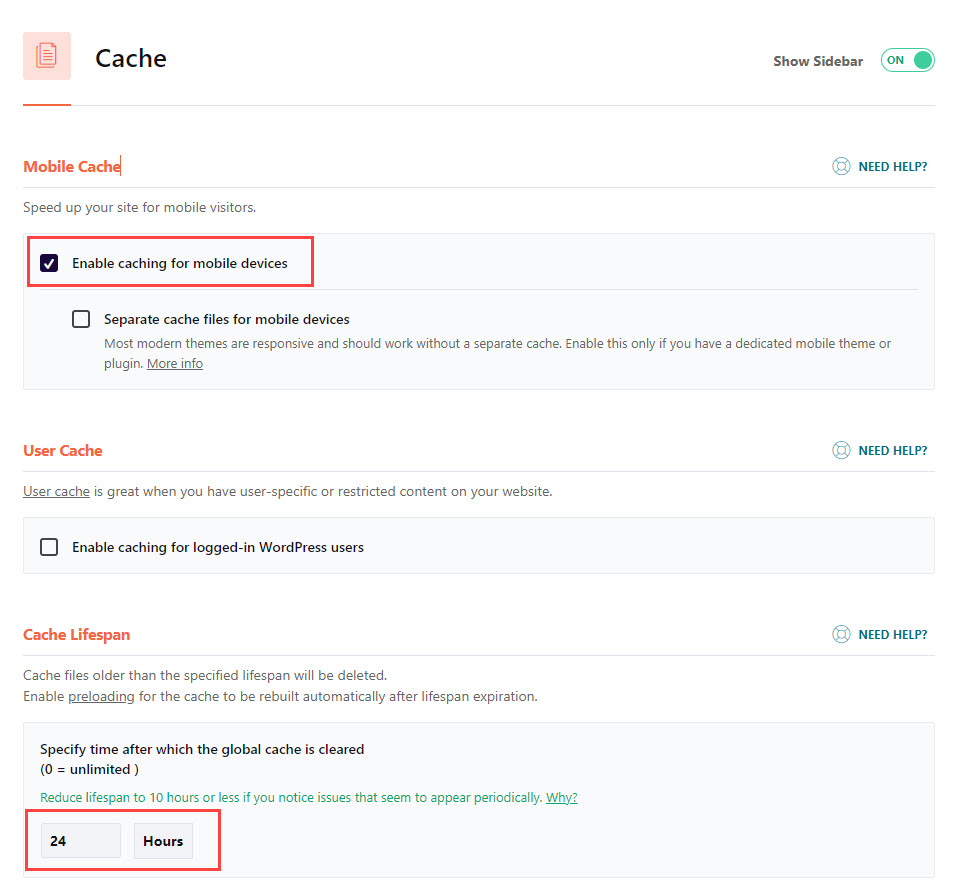
- Enable Caching for Mobile Devices: Activate this to enable mobile users to be served pages from the cache.
- Separate Cache Files for mobile devices: Most themes are responsive, so this is not something you will need unless you have mobile-specific elements or pages or plugins.
- User Cache: You can keep this off unless you have users logging into your website. For example, an eCommerce store or a membership website.
- Cache Lifespan: The lower the number, the more often your cache is cleared and rebuilt with the latest content. A higher number means the cache is cleared less frequently and uses fewer server resources.
You should check if your hosting provider provides a cache solution. It is not advisable to have two caching solutions running simultaneously.
Hosts like WP Engine, Flywheel, and Kinsta have their in-house caching solution, so WP Rocket page caching is automatically disabled.
Siteground has its cache plugin called SG Optimizer. If you are using this for caching, then make sure you disable caching in WP Rocket using the Disable Cache helper plugin from WP Rocket.
If you are using Super Page Cache for Cloudflare for CDN integration, then disable WP Rocket Caching.
The bottom line: Make sure you don’t have two caching solutions running. Use the helper plugin to disable page caching (if not done automatically by the host).
3. File Optimization Settings
The file optimization feature is crucial because it helps you address important recommendations thrown up by Google Pagespeed and improve performance.
CSS Settings
| CSS Setting | Status or Value |
|---|---|
| Minify CSS | Enable |
| Optimize CSS Delivery | Enable |
| Remove Unused CSS | Enable Recommended Option for better performance |
| Load CSS Asynchronously | Disable (Enable only if the Remove Unused CSS option causes issues) |
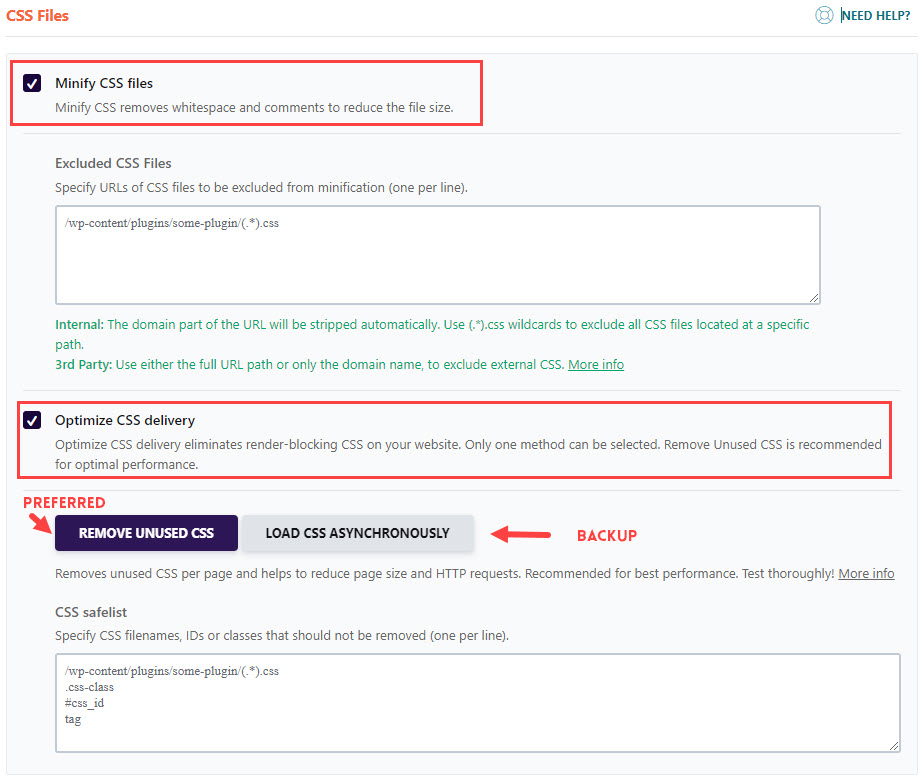

- Minify CSS: Keep this enabled. This helps reduce CSS file size. It eliminates white space and comments in the CSS code and replaces longer variable names with shorter ones. A smaller file means a lower overall page size that can be transmitted faster over the internet.
- Optimize CSS Delivery: You have two options – the Removed Unused CSS option or loading CSS asynchronously. This optimization will help address one of the more commonly identified issues in Pagespeed tests-Eliminate Render Blocking Resources. You can use only one of these options, not both.
- Removed Unused CSS (Recommended): This option works by identifying all the unused CSS of a page and removing it. This is considered highly efficient and great for speed metrics, but at the same time, it can also cause issues and break your site. It should be your preferred option during setup. Test your site thoroughly, and make sure all pages are rendering correctly. If you encounter any issues that can be a problem, switch to the fallback option of loading CSS asynchronously.
- Load CSS Asynchronously (Backup): To be enabled only if removing unused CSS doesn’t work. It is the less preferable option because it is not as efficient but has fewer issues. This works by generating critical CSS (CSS needed only for the visible part of the page) and processing it first. The rest of the CSS is deferred, preventing render blocking. If you change or modify the CSS of a page at any time, you must regenerate the critical CSS.
JavaScript/ JS Settings
| JavaScript Setting | Status or Value |
|---|---|
| Minify JavaScript Files | Enable |
| Combine JavaScript files | Disable (it won’t be enabled anyway once you activate the Delay JavaScript Execution setting.) |
| Load JavaScript Deferred | Enable |
| Delay JavaScript Execution | Enable |

Minifying JS is the same as CSS – it helps reduce file size.
Leave the Combine JS option unchecked. Enabling the Combine JavaScript files feature consolidates all JavaScript files and inline scripts into one file.
This consolidation reduces the number of HTTP requests made by your website, making it useful for websites employing HTTP/1.
For websites using HTTP/2, the benefits are limited. This is automatically disabled when you use the Delay javaScript Execution feature.
The Load JavaScript Deferred option goes a long way in addressing the PageSpeed recommendation to “Eliminate Render blocking resources”
From a performance standpoint, deferring JavaScript helps prioritize the page’s rendering first. The “defer” tag is added to JS files and loaded after rendering is completed.
But this may not be the right thing to do for a JS file that is needed upfront during initial rendering. Identify and add these files to the exclusions list to prevent them from being deferred.
Another feature that helps with page speed is the Delay JavaScript Execution feature. Enable this option to stop the loading of JavaScript till there is a user interaction like scrolling, moving the mouse, pressing a key, and so on.
Need to exclude some JS from being delayed: Use the one-click exclusions section to exclude JS files of commonly used features like Google Adsense, Maps, Analytics, etc.

When it comes to metrics, delaying JavaScript will improve Total Blocking Time (TBT) and First Contentful Paint (FCP). This also helps address pagespeed recommendations like removing unused JavaScript and minimizing main thread work.
The Combine JS option will be disabled when the Delay JavaScript option is enabled.
The CSS and JS optimization features are powerful tools that can make a significant difference in page performance, so make sure you set this up correctly, test your website thoroughly, and fix any issues or add exclusions where necessary.
4. Media Settings
The media tab enables the LazyLoad and Missing Image Dimensions features.
| Media Setting | Status or Value |
|---|---|
| Enable for Images | Enable |
| Enable for CSS Background Images | Enable |
| Enable for iframes and videos | Enable |
| Replace YouTube iframe with preview image | Enable |
| Add Missing Image Dimensions | Enable |
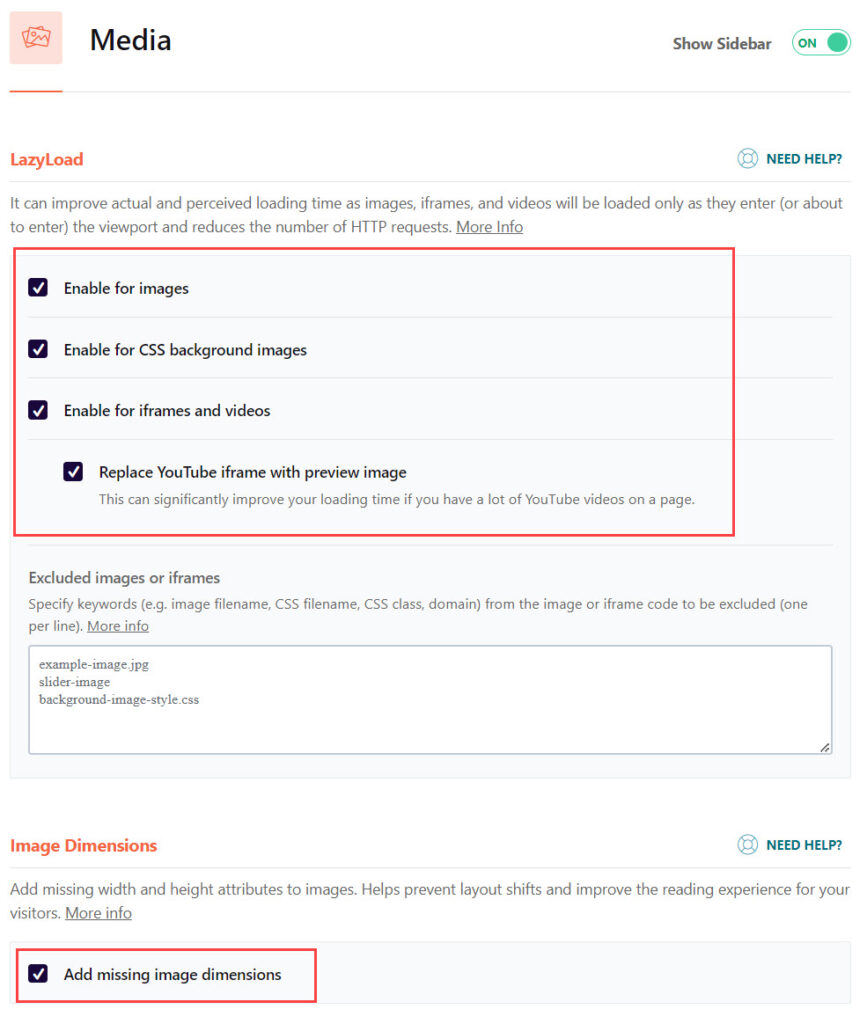
The lazyload feature prevents the loading of images until they come into the viewport of the browsers. Images can form a significant part of your page size, so delaying the loading of images reduces the initial page size and the load on your server.
Lazyload can greatly improve performance for mobiles with slower internet connections. Enable Lazyload for both images and CSS background images.
Videos are, again, large files. So, Lazyload must be enabled for videos, with the option of using a preview image for YouTube Videos. This loads a preview image of the YouTube video instead of the embedded YouTube player. Clicking the image will load the embedded player.
The Add Missing Image Dimensions works by adding an explicit width and height to the image in the HTML if it does not have one.
If an image does not have any height and width specified, when the HTML is generated, there will be no space earmarked for the image.
When the image loads, it will push elements to the side or down, causing a visible layout shift. This means poor Cumulative Layout Shift (CLS) scores and Core Web Vitals.
With Missing Image Dimensions enabled, WP Rocket will add the width and height dimensions for any image that doesn’t have it and ensure that the page has a placeholder space left for it.
When the image loads, there will be no layout shift.
5. Preload
| Preload Setting | Status or Value |
|---|---|
| Preload Cache/ Activate Preloading | Enable |
| Preload Links/ Enable Link Preloading | Enable |
| Prefetch DNS Requests | Enter the External URLs to preload |
| Prefetch Fonts | Enter the paths of self-hosted fonts for preloading |
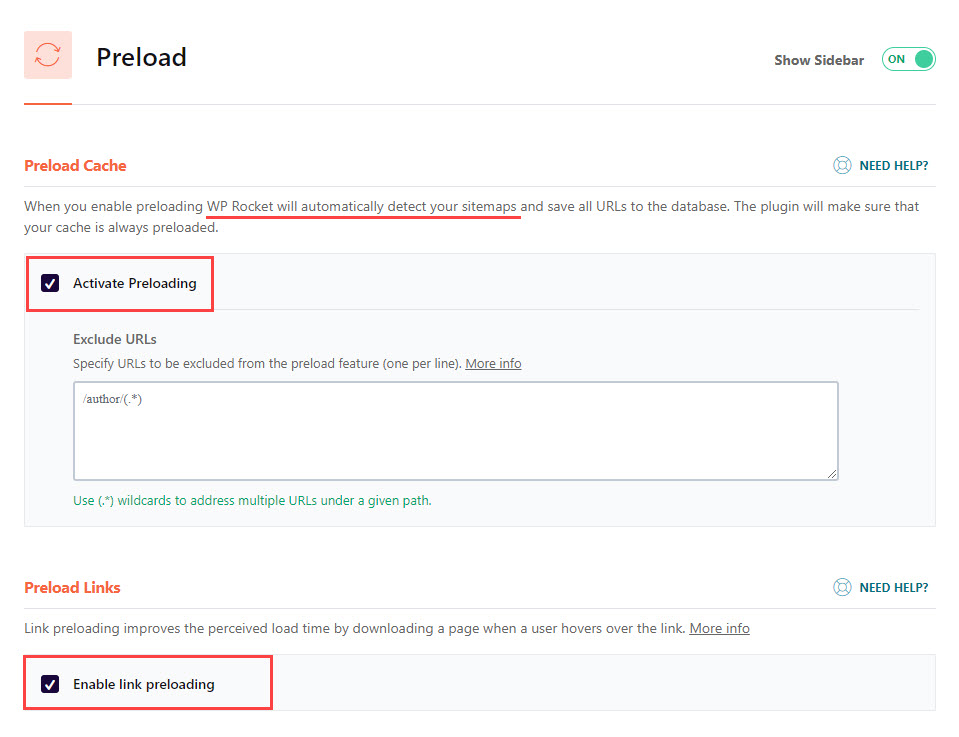
The Preload Cache should be enabled. This feature simulates a visit to the pages on your website and caches the generated files. When you have a real visitor, the cache is ready to serve the web page directly.
The preload feature will access the sitemap of your website and visit all the URLs found in it. SEO plugins like RankMath, Yoast, and All in One SEO, generate a sitemap used by WP Rocket for preloading.
The preload feature is also activated when you update or publish a post/ page – the cache is purged, and the new page is preloaded into the cache.
If there are any URLs that you want to exclude from preloading for any reason, you can use the box provided to enter a list of URLs to exclude.
The Preload Links is another useful feature that should be enabled even though it has no impact on Google PageSpeed scores. Link preloading is triggered when you hover over a link in a page or a post for more than 100ms. The linked page is preloaded in the background.
If you click on the link, the page will appear to load faster than normal because some loading work has already been completed in the background. This will make a user feel that the pages are loading very fast – so great for actual user experience.
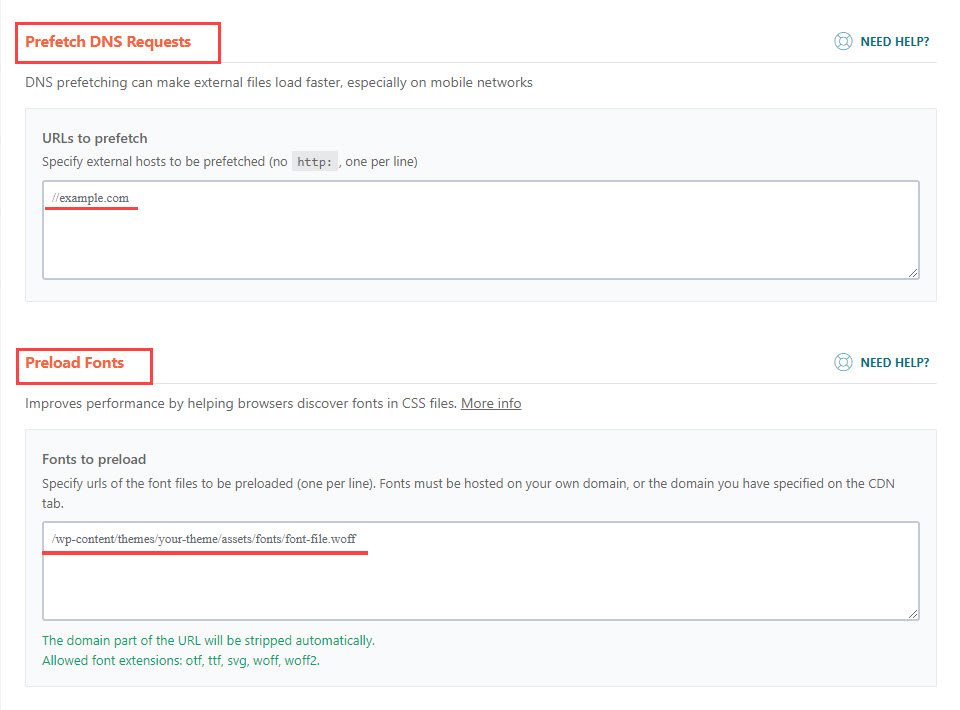
Using the Prefetch DNS option will save connection time to the external domain if you access external resources like Google Fonts or YouTube videos. Specify the list of domains to prefetch in the box provided.
If you are self-hosting fonts, instead of using an external provider like Google Fonts, you can use the Preload fonts to fetch the fonts sooner rather than later in the page rendering process.
Use this feature judiciously – don’t try to load all the fonts used in your website. Just the ones that are needed in initial rendering. Too many fonts will delay page rendering. On a more general note, I would recommend limiting the number of fonts used on a website. It gives a better user experience and limits performance issues arising from fonts.
Preload fonts will not work/be disabled when the Remove Unused CSS option is active. The fonts are preloaded while processing the used CSS, making this standalone feature redundant.
6. Advanced Rules
The advanced rules section will probably not require any configuration for most websites, especially those with static content or without user-specific data. For websites with dynamic or user-specific content, read on to identify which options you need to configure.
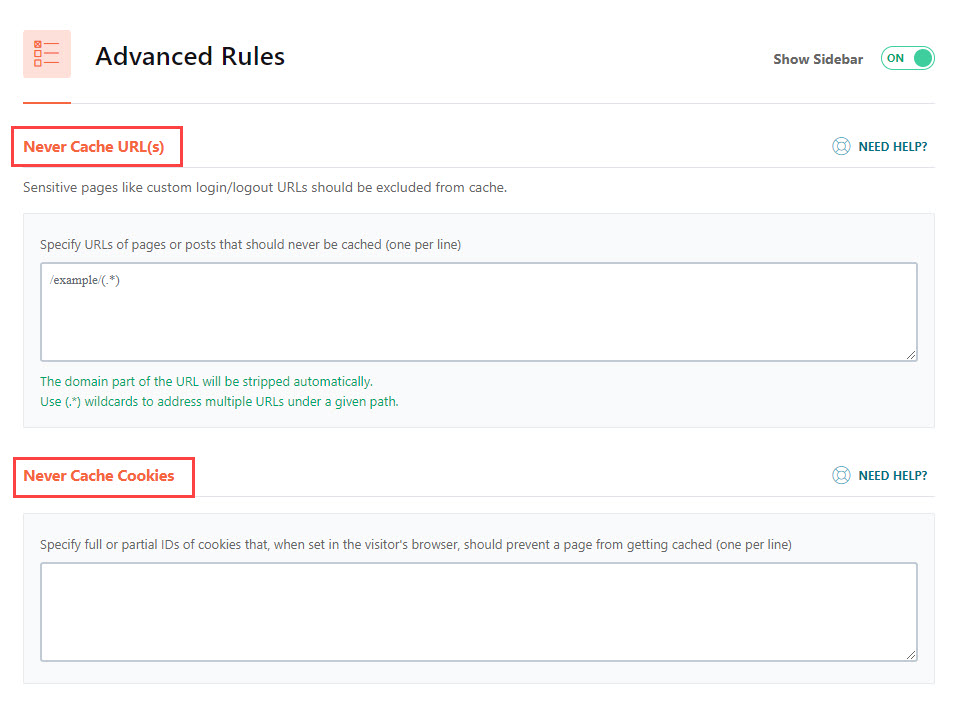
The Never Cache Rules option can be used if you have dynamic pages you don’t want to be cached. This is true for eCommerce sites with account or checkout pages, where the content will be dynamic.
You don’t want to show the shopping cart of one user to another user, which will happen if the page is cached.
WP Rocket already supports popular eCommerce plugins like WooCommerce, BigCommerce, and Easy Digital Downloads. It excludes the account, cart, and checkout pages generated by these plugins from the cache.
If you are using an eCommerce plugin that is not supported, make sure you add the URLs to the exclude box provided.
The Never Cache Cookies feature is similar to URLs, where you exclude certain pages based on cookies indicating the page’s dynamic nature.
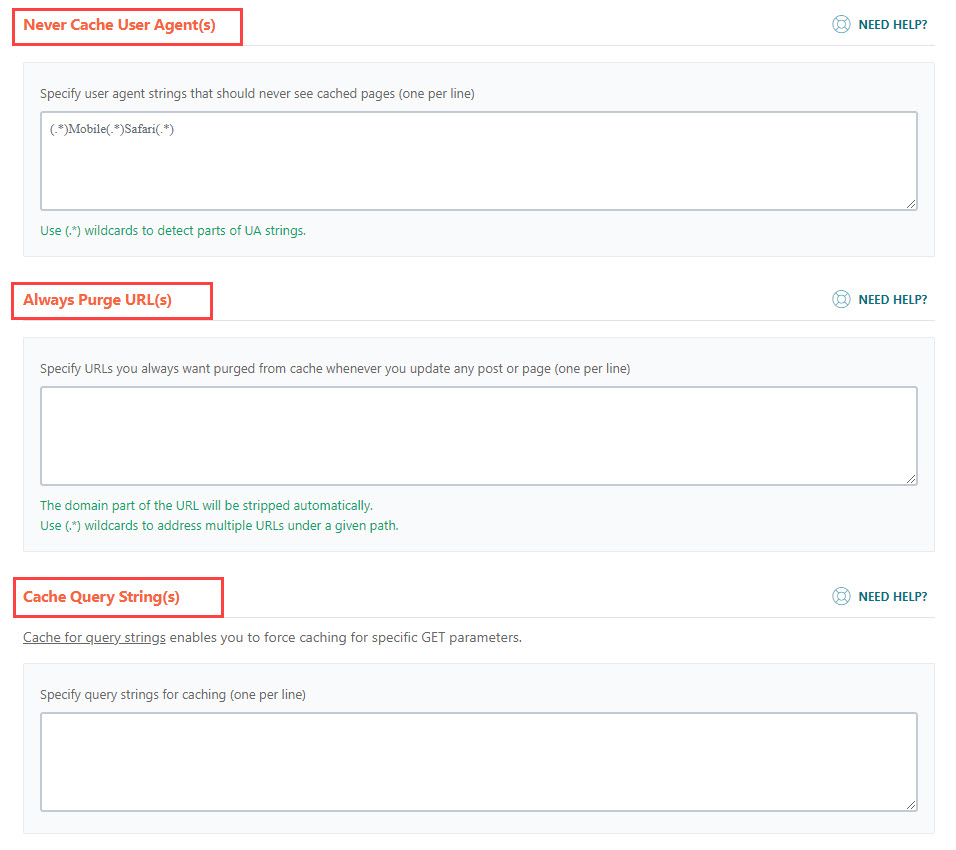
The Never Cache User Agents feature prevents certain browsers or devices from caching your website pages.
For example, if you want to stop Safari browser from caching your pages, add the below string in the box provided:
(.*)Safari(.*)The Always Purge URLs option lets you specify a set of pages you want to be purged whenever you modify or update a page or a post. WP Rocket does this automatically for the most part, so this feature may not be one you will need to use, except in some rare use cases where you see a need.
By default, WP Rocket does not cache pages with query strings. But there might be a need in some scenarios on eCommerce websites where this might be useful. Most blogs or websites can ignore this.
7. Database
The WP Rocket database settings is focused on keeping your database clean and optimized for best performance.
| Database Setting | Status or Value |
|---|---|
| Post Cleanup | |
| Revisions | Disable |
| Auto Drafts | Disable |
| Trashed Posts | Enable |
| Comments Cleanup | |
| Spam Comments | Enable |
| Trashed Comments | Enable |
| Transients Cleanup | |
| All Transients | Enable |
| Database Cleanup | |
| Optimize Tables | Enable |
| Automatic Cleanup | |
| Schedule Automatic Cleanup | Enable (Weekly Frequency) |
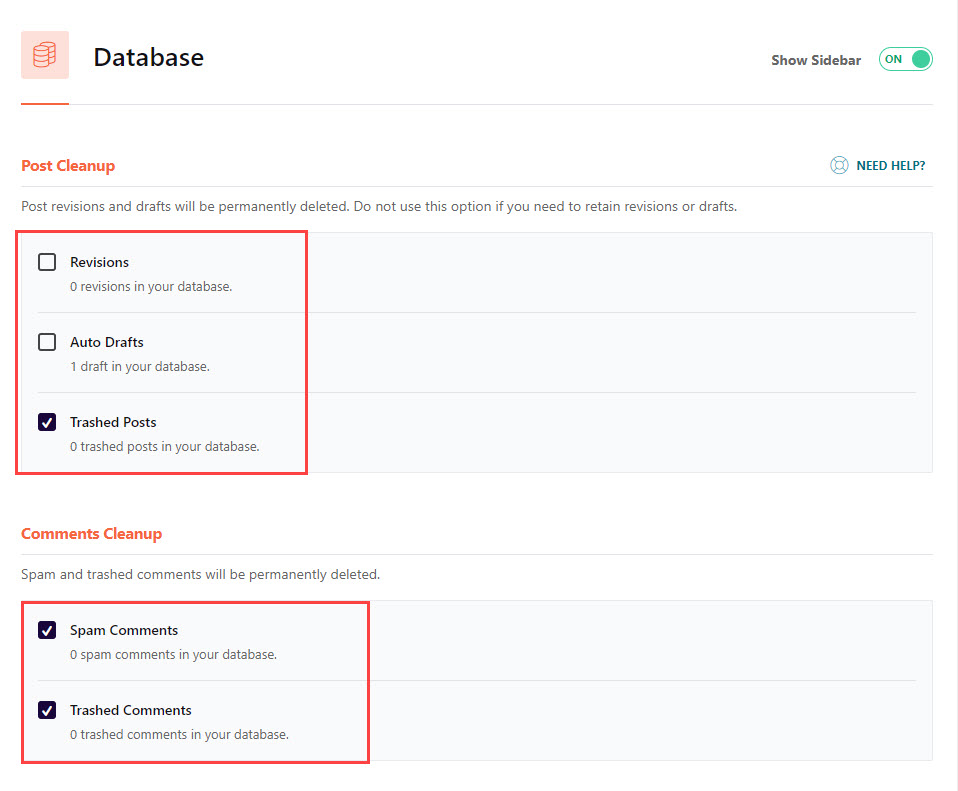
Post Cleanup
Revisions: Once a post is published, every time you modify or update the post, the previous version is stored as a revision. The revisions feature helps you revert to an earlier version if needed.
If you enable this feature, every revision is stored until you run a cleanup, and if you do, all revisions are lost across all posts. So my recommendation would be to disable the Revisions Cleanup.
Instead, you can add a piece of code to your wp-config file and store only a fixed number of revisions, like, say 5 revisions for any post. I have implemented the same for Coolfundas. The code to add to your wp-config file is as follows:
define( 'WP_POST_REVISIONS', 5 );Auto Drafts: Auto drafts are similar to the autosave in Microsoft Word. It periodically saves your work-in-progress posts in case you lose power or your computer crashes. Keep this disabled so that the cleanup does not remove drafts automatically.
Trashed Posts: The name makes it obvious – Any posts you have deleted are in your trash folder. Keep this option enabled to automatically delete it during a scheduled cleanup (discussed later).
Comments Cleanup
Spam Comments: Comments marked as spam either manually or automatically will be removed from the database.
Trashed Comments: Comments marked as trashed are removed from the database.
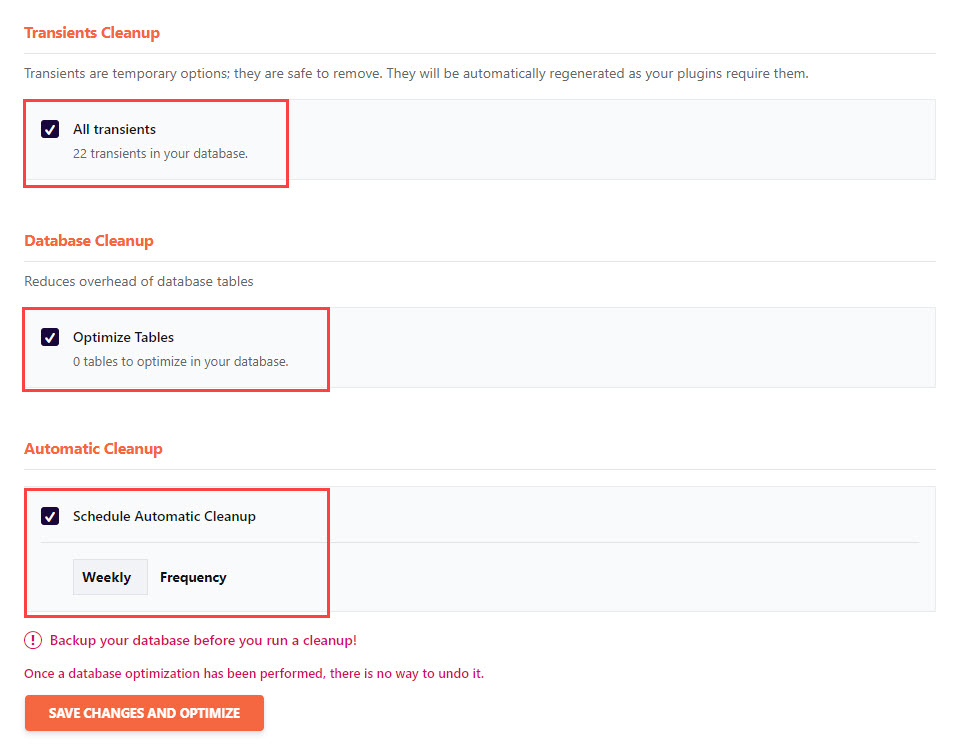
Transients Cleanup/ All Transients: Transients are temporary data created and used by plugins. You don’t need to keep it and can safely remove it. Keep the cleanup option enabled.
If any plugins require transients, they will create or regenerate them as needed.
Database Cleanup/ Optimize Tables: Keep enabled. This optimizes the tables for efficiency and faster operation.
Schedule Automatic Cleanup: Enable scheduled cleanup and set the frequency to “Weekly.” WP Rocket will run this process per the schedule and keep the database clean and optimized.
Note: You can also use a tool like WP-Optimize to optimize your database instead of WP Rocket. WP Optimize is more powerful and gives you more granular control by allowing you to clean up at a table level. This works well for advanced users, but for most websites, WP Rocket should be good enough.
8. CDN
When it comes to CDN, there are multiple ways in which you can set it up, and this depends on the CDN provider you are using.
- Rocket CDN: This is an in-house CDN offering from WP Rocket that leverages Stackpath for delivering CDN services. It costs $7.99 per month. If you sign up for this service, the CDN settings will be automatically configured in WP Rocket.
- Cloudflare CDN: Cloudflare is a very popular CDN service powering over 20% of the websites in the world today with 285 edge servers worldwide. With a free plan to boot, setting this up and taking advantage of its CDN and protection features is a no-brainer for most websites, especially beginners. To use Cloudflare with WP Rocket, you will have to configure this in the “Add on” tab. You can read our detailed instructions on setting up WP Rocket with Cloudflare to get this up and running.
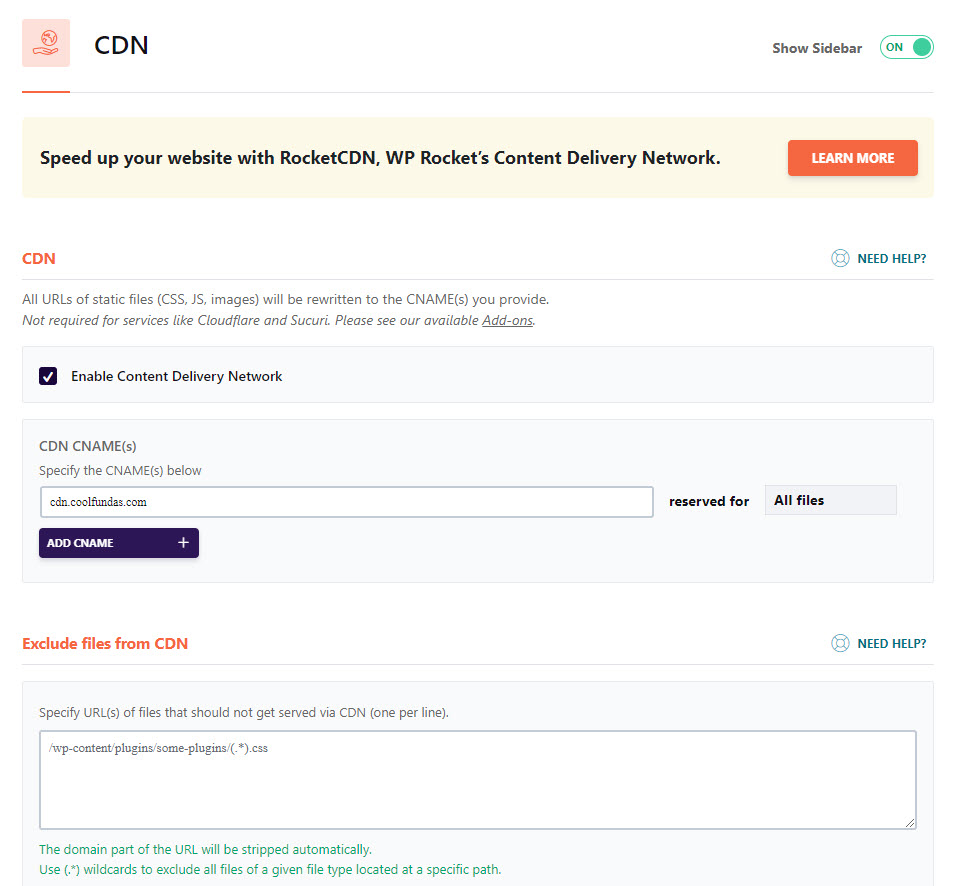
- Other Third-Party CDNs: If you are using a CDN like KeyCDN, BunnyCDN, or another CDN, then set up your CDN account first.
- After the CDN setup is complete, get the CDN URL which will probably be something like cdn.coolfundas.com or similar.
- In WP Rocket, activate the “Enable Content Delivery Network” option.
- Enter the URL from your CDN provider in the CDN CName(s) field provided. Save to activate the CDN for all static files like CSS, JS, and Images.
Note: A CDN may not be needed for every website. If you have low traffic, and your customers or visitors are from the same geographical region as your website’s server location, then a CDN may not make a big difference. A CDN adds more value when you have a higher traffic load with visitors from all over the world.
While there are many CDN services out there (check out this list of top CDNs in terms of performance), here are the ones we recommend from our experience:
- Bunny CDN: Bunny CDN frequently tops the charts when it comes to performance. It has over 120 edge servers worldwide with a latency of 24 ms.
- It has proven to be a reliable CDN service and is popular for its pricing model, where you pay based on the bandwidth you use instead of a standard subscription fee. This works well for websites running on a budget.
- You can also buy an image optimization service that compresses your images and delivers them in WebP format on the fly.
- FlyingCDN: FlyingCDN is a CDN service from the FlyingPress team that leverages the Bunny CDN platform and delivers a combination of Bunny services that includes CDN, storage, replication, and image optimization features for an affordable price of $3 per month for 100 GB. It’s a great deal for anyone looking for more than a simple CDN solution.
- Cloudflare Pro: Cloudflare Pro is a paid plan from Cloudflare that includes CDN and security features, APO (WordPress Automatic Platform Optimization), and Image optimization that can deliver fast load times and low TTFB. The Cloudflare Pro plan costs $20 per month when billed annually – recommended for websites with medium to high traffic.
- If you plan to use Cloudflare APO, you must use the official Cloudflare plugin to connect your website and Cloudflare. In this scenario, disable the Cloudflare Add-On in the WP Rocket panel and use only the Cloudflare plugin.
- Cloudways Hosting with Cloudflare Enterprise Add-on: The Cloudflare Enterprise plan with its feature stack is offered as part of the Cloudways hosting plan for an add-on price of $5 per month. It is an excellent option if you are already on Cloudways or plan to move to it. Coolfundas is currently running on Cloudways with Cloudflare Enterprise enabled.
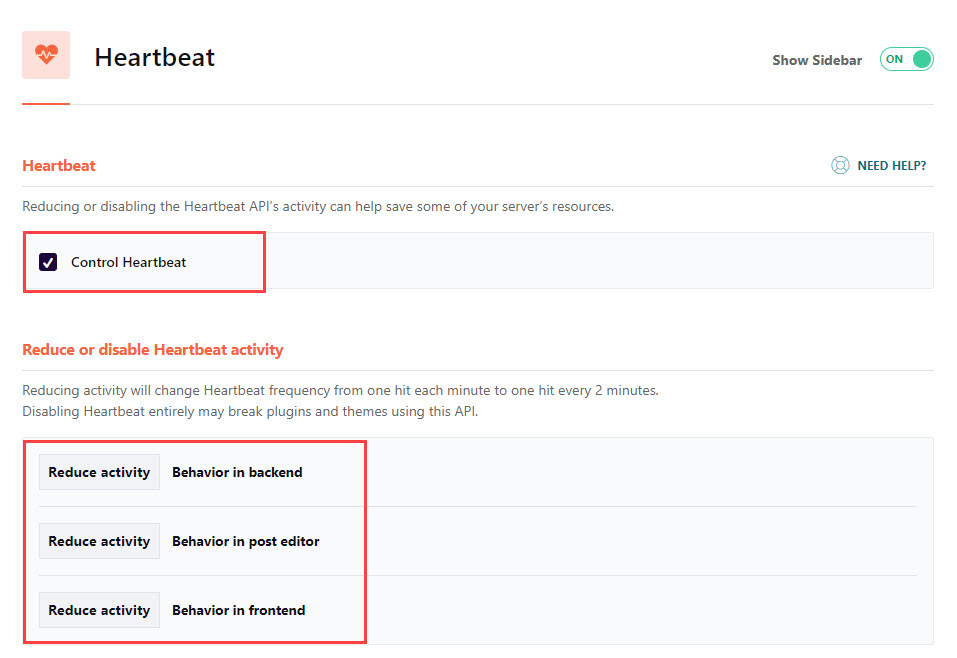
9. Heartbeat
The “heartbeat” feature in WordPress is used to track administrative and user-related tasks within the WordPress dashboard.
| Heartbeat Setting | Status or Value |
|---|---|
| Control Heartbeat | Enabled |
| Behavior in backend | Reduce Activity |
| Behavior in post editor | Reduce Activity |
| Behavior in frontend | Reduce Activity |
- Autosave and Post Locking: Periodically autosave your work in progress when editing posts or pages. This helps to minimize data loss.
- User Activity Tracking: Monitors user activity in the admin area to check if a user is still active or has left the page. This feature helps in post locking and prevents different users from editing the same post simultaneously.
- Real-time Notifications: Notifications for updates like new comments or orders.
While the heartbeat feature is useful, it can stretch server resources since it runs every 15 seconds for post-editing and 60 seconds for the dashboard. We recommend setting the Backend, Front end, and post editor to “Reduce activity” mode, where the heartbeat runs once every 2 minutes instead of every minute.
10. Add-Ons
The Add-ons tab covers integration with third-party tools with additional performance benefits.
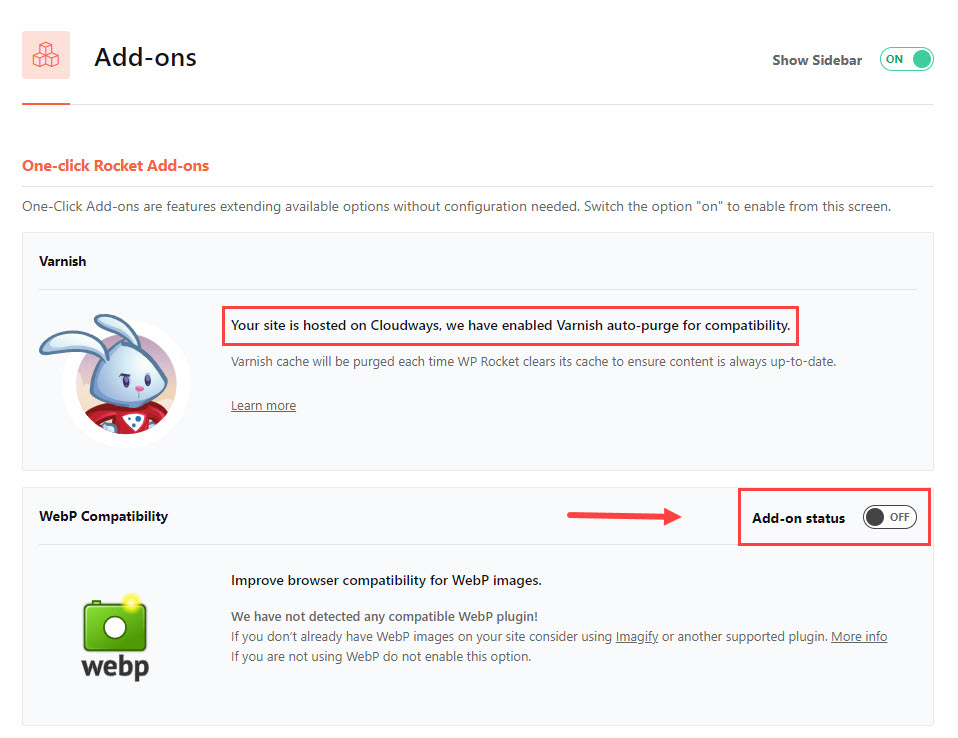
The Varnish setting is automatic and will be enabled if your hosting provider supports the Varnish cache. This feature in WP Rocket syncs the purge function between WP Rocket and Varnish.
WebP Compatibility: A few scenarios for WebP will decide whether you need this option ON or OFF.
- If you are using a CDN like Cloudflare or Bunny CDN, and are using their image optimization features, then you DON’T need to turn ON WebP compatibility. Your CDN/ Image optimization service will handle all the work of creating WebP images, storing them, and delivering them with your web pages.
- You also don’t need WebP compatibility if you are using an Image Optimization plugin like Imagify, Shortpixel Adaptive Images, or Optimole and are using them for WebP delivery.
- The only scenario where you need WebP compatibility turned ON is when you have plugins or CDNs creating the WebP images but are not serving them. Enabling the WebP option in WP Rocket will help serve these WebP images.
Note: WP Rocket won’t create the WebP images for the images in your media library – You must use a plugin like ShortPixel Image Optimizer or Imagify (from WP Rocket) to create the WebP version for this feature to work.
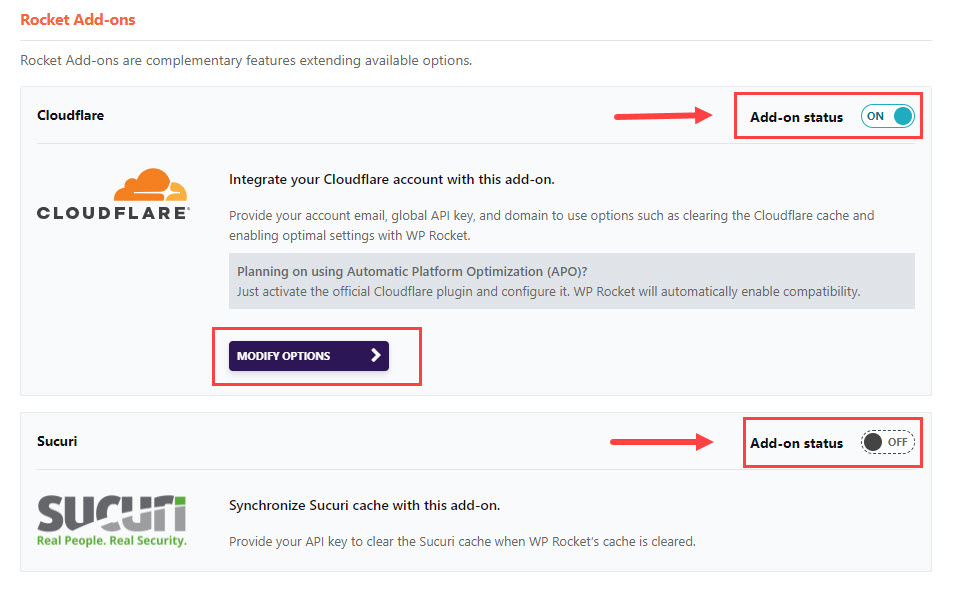
Cloudflare Integration: If you use Cloudflare, activate this add-on and connect your Cloudflare account to WP Rocket. This helps with purging, optimal settings, and improved compatibility. This connection is not mandatory – Cloudflare will work for your site without this integration.
Note: Using the Cache Everything rule in Cloudflare might not work with WP Rocket due to browser cache rules in the htaccess file. Set an Edge Cache TTL rule with Cache Everything in Cloudflare to resolve this.
Sucuri Integration: If you use the Sucuri Firewall and Cache in your WordPress installation, enable this Add-On to sync the Sucuri and WP Rocket Cache.
11. Image Optimization
There is nothing to set up here. WP Rocket does not have an image optimization feature, as mentioned earlier. You need to use an external tool for the same.
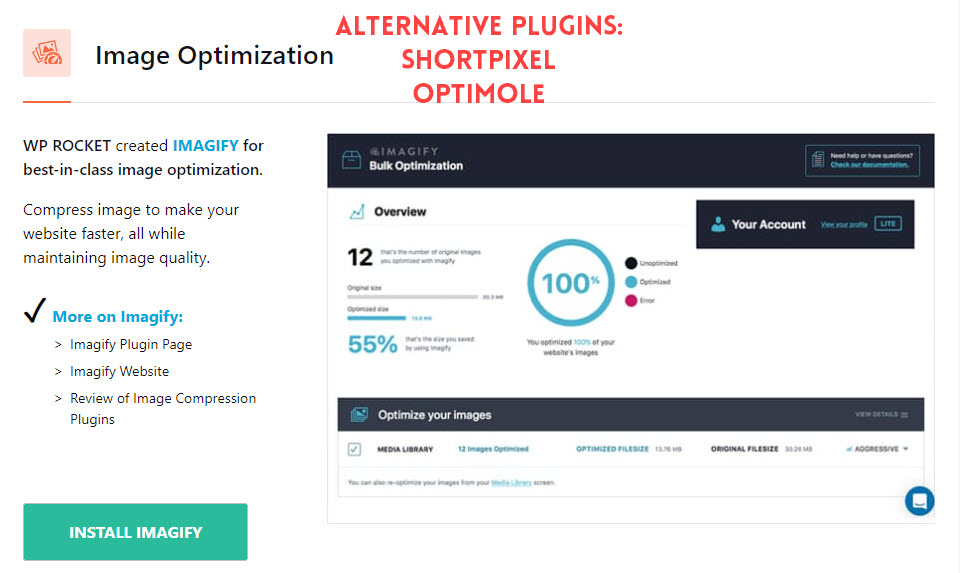
You can choose to:
- Use an Image Optimization plugin like Shortpixel Adaptive Images or Optimole to compress the images. While Imagify from WP Rocket is an option, their free tier is limited to 20 MB per month and starts at $9.99 monthly for a paid plan. I suggest checking out the credits package from Shortpixel as a much more affordable option, especially for beginners and small websites.
- or enable your CDN’s Image Resizing and Optimization feature to take care of this (if available).
The reduction in page weight/ size is significant, so you should optimize images using any of the methods available. Reducing the weight of the page means less data to transmit and faster loading of web pages. It can make a huge difference for users with a slow internet connection.
12. Tools
The tools section is more of an admin part of the WP Rocket plugin.
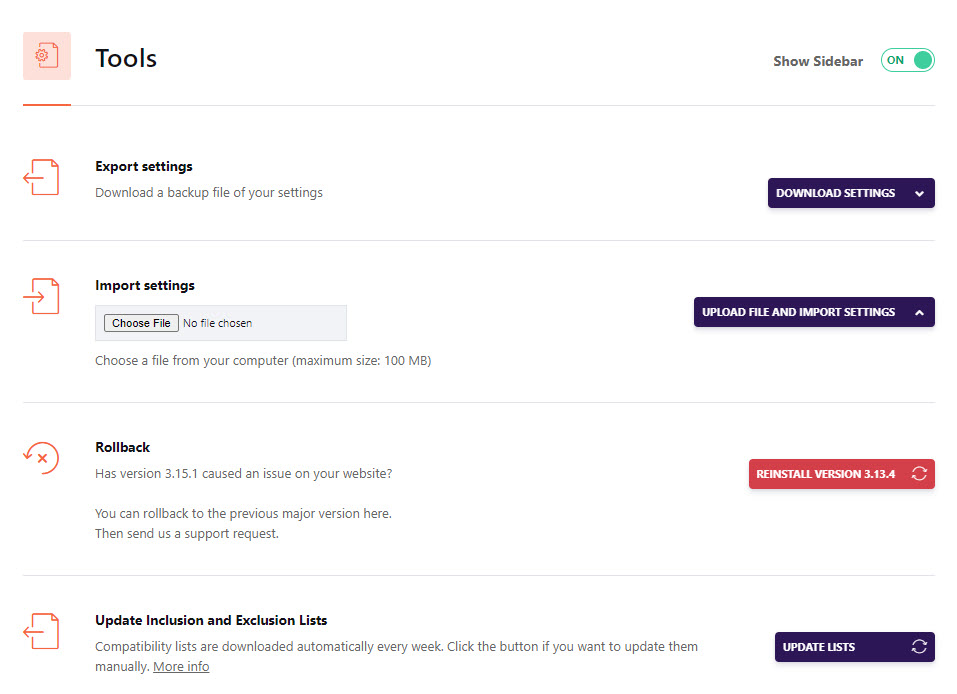
In this section, you can do the following:
- Export your WP Rocket settings to your computer. You can use it to restore your settings if the need arises. It is especially useful if you have multiple sites and want to replicate the same settings.
- Use this to Import your WP Rocket settings from your backup or another site.
- Roll back to a previous version if you face any issues from a particular update.
- Manually trigger an update to the Inclusion and Exclusion lists if needed, but you will likely never need to use this. The list is auto-updated every week from a WP Rocket server.
Performance Test with Recommended WP Rocket Settings + CDN
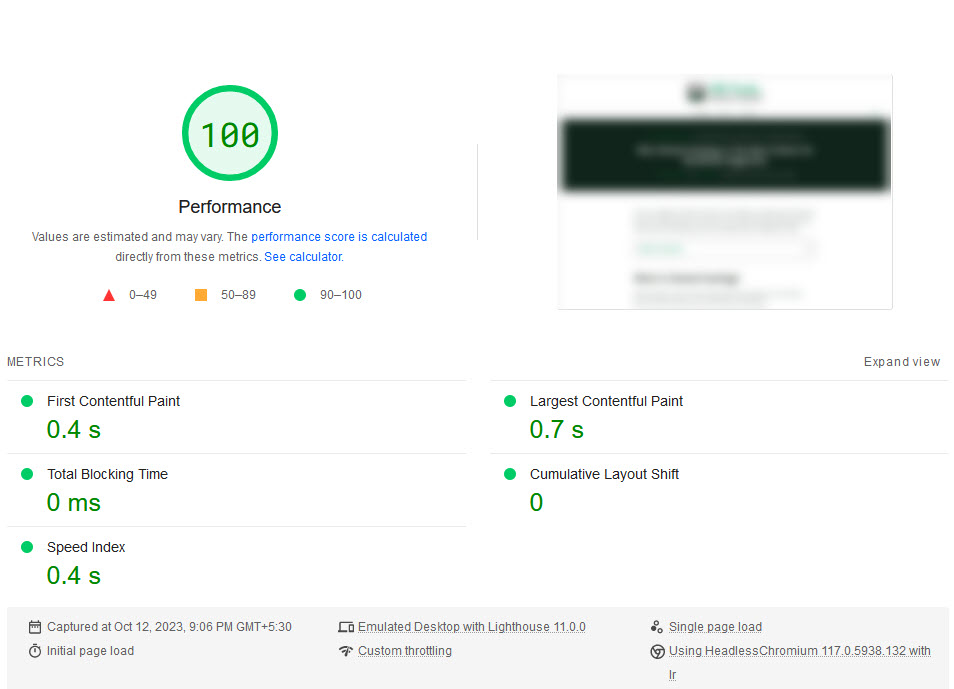
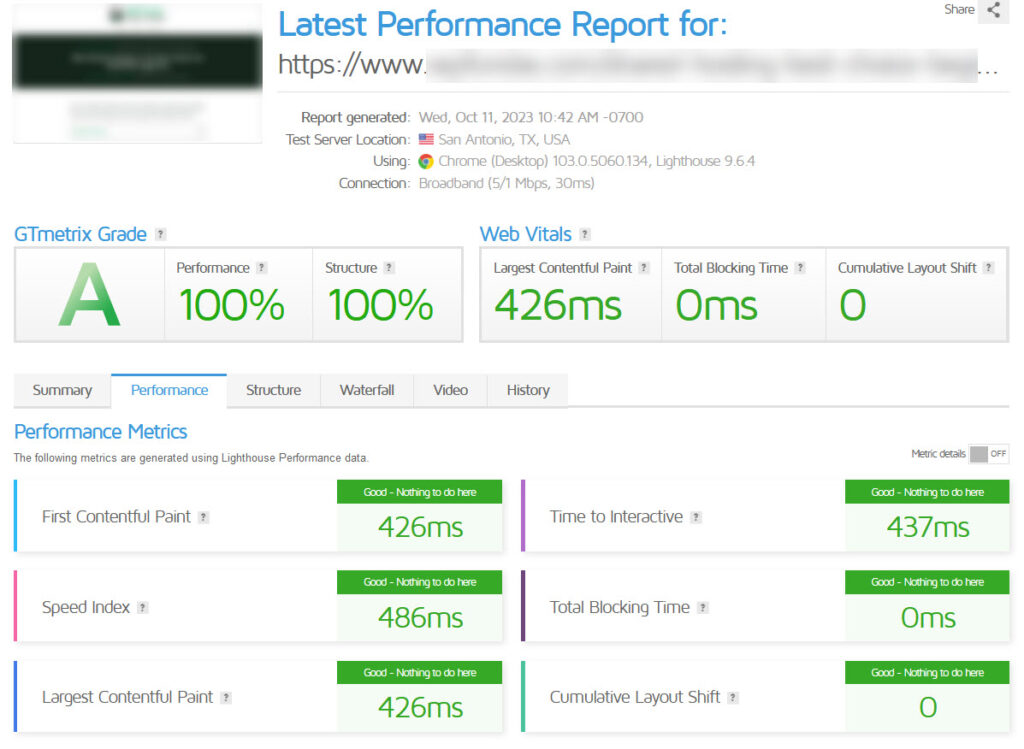
Now that we have run through all the best WP Rocket settings, running a performance test on our test bed with these settings will help illustrate the improvement in speed. The test bed has Shortpixel Adaptive Images installed for Image optimization.
WebPageTest, Pagespeed, and GTMetrix Test Results with WP Rocket + Image Optimization + CDN:
SpeedVitals Performance Report – TTFB Check and CDN Performance:
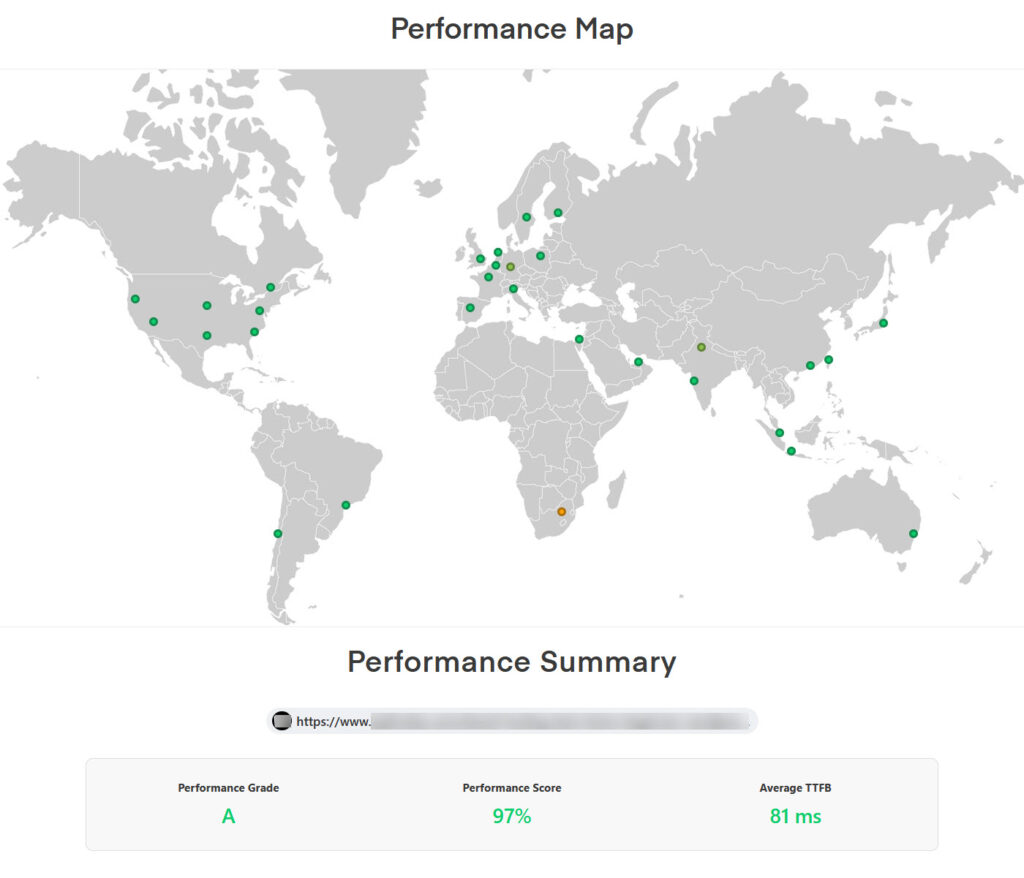
The test server is located in a Cloudways server in Bangalore. The performance map for the CDN across the world can be seen in the map below, with green representing low TTFB times.
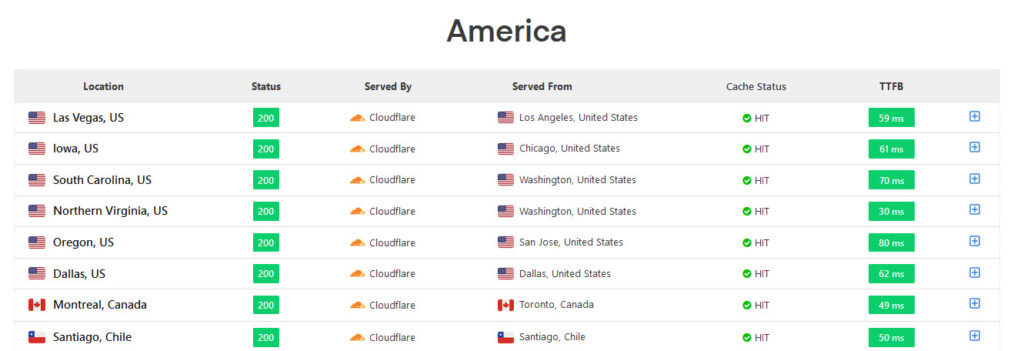
The TTFB metric for multiple locations across the American content is <100 ms, as seen in the graphic below.
Performance Comparison Table and Chart
The final performance test had two scenarios for comparison – the first with WP Rocket configured with the recommended settings discussed above but without a CDN and the second with a free Cloudflare CDN connected to the test website.
The table below illustrates the performance improvement with WP Rocket.
| Performance Metric (Average time in Sec) | Without WP Rocket | WP Rocket Default Settings | WP Rocket Recommended Settings + Image Optimization | WP Rocket + Image Optimization + Cloudflare CDN |
|---|---|---|---|---|
| TTFB – Time to First Byte | 2.21 | 1.03 | 1.02 | 0.17 |
| FCP – First Contentful Paint | 2.92 | 1.71 | 1.15 | 0.37 |
| LCP – Largest Contentful Paint | 2.99 | 1.71 | 1.15 | 0.37 |
| Total Page Loading Time | 5.03 | 3.76 | 1.68 | 0.67 |
| Page Size (in Kb) | 963 Kb | 959 Kb | 167 Kb | 166 Kb |
| Nr of Requests | 42 | 41 | 10 | 10 |
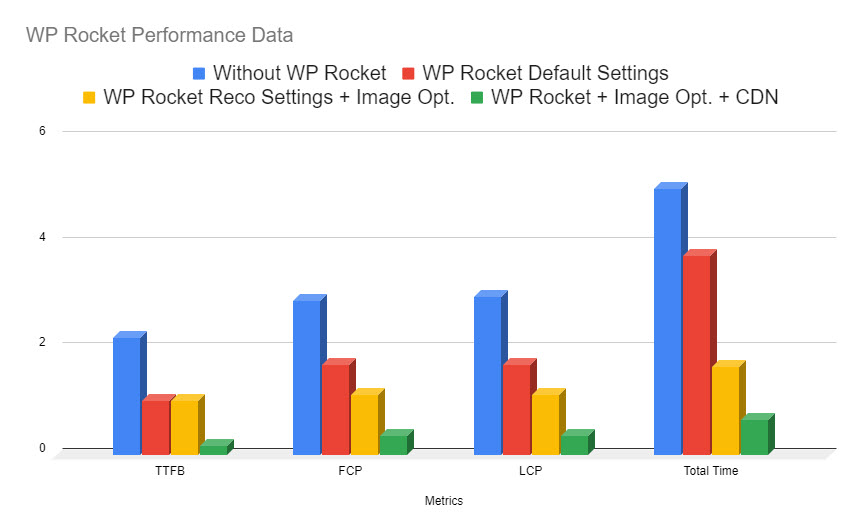
Understanding the Performance Data:
- With the default WP Rocket settings, the main feature is caching – this eliminates the time the server takes to generate the page by serving the page directly from the cache, which is reflected in lower TTFB, FCP, and LCP.
- With the recommended settings, you end up with lighter pages and faster page loading times with the help of optimized and minified CSS and JS, lazy loading, and lighter images. The TTFB time remains more or less the same since the pages are still being delivered from your server to a global audience, but the FCP and LCP time is lower.
- Implementing a CDN takes your website closer to your visitors, with the content replicated on edge servers worldwide. This reduces the distance/ latency, and visitors will experience super-fast loading speeds. The TTFB time is less than 100 ms for visitors globally, and overall page load times are less than 1 second.
Tips for getting the Best out of WP Rocket
Every WordPress installation is different, so this guide is best used as a reference document. As you work through the settings, test different pages and make sure nothing is broken. If you find any issues, you have a couple of options:
- Use the exclusion boxes to stop optimizations on certain pages if they break. You can also disable WP Rocket for specific pages or posts using the panel in the sidebar during editing.
- Use the helper plugins provided by WP Rocket to disable optimizations if not needed.
- Don’t preload everything if you have a large website with many pages and posts. Limit preload to only high-traffic pages.
- Use WP Rocket Troubleshooting guides and Documentation to work through issues.
- Contact WP Rocket Support to get assistance if you get stuck.
Using WP Rocket with Other Plugins
From my experience working on setting up multiple websites, using a standalone caching plugin like WP Rocket as the only solution is not always the case. This could be due to the hosting solution, client requirements, or another plugin that optimizes an area better than WP Rocket.
Here are some of the plugins that I have seen being used in combination with WP Rocket:
- Some hosts have their in-house caching solution, so the WP Rocket caching feature must be disabled.
- Hosts like Siteground provide a standalone caching plugin called SG Optimizer, which can be used with WP Rocket for the best optimization.
- Super Page Cache for Cloudflare is another popular caching solution that integrates directly with Cloudflare for CDN.
- Autoptimize and Perfmatters are used for handling CSS optimizations and Lazy Loading with the ability to exclude above-the-fold images from Lazy loading (which WP Rocket does not have).
- Image optimizations can be handled using a plugin like Imagify, Shortpixel Adaptive Images, or Optimole. if you are using a CDN like Cloudflare or Bunny CDN, use their Image CDNs instead to get better results.
Wrapping Up: WP Rocket Setup
Setting up WP Rocket in the settings screen is not the tough part – the user-friendly navigation and design make it all very easy, and also why WP Rocket is a popular plugin choice.
To fine-tune WP Rocket settings and get fast loading speeds, you need knowledge and help to identify, troubleshoot, and implement these settings on your WordPress website. This is where WP Rocket sets itself apart from its competitors – the in-depth documentation, tutorials, troubleshooting guides, and compatibility with different hosting solutions help make WP Rocket faster than most other options.
Let me know how your WP Rocket setup goes, any challenges you faced, and what you did to solve them. I will keep updating this guide to keep it relevant.

